
After yesterday’s introduction where I tried to convince you that now is the perfect time to learn FreeCAD, let’s get our feet wet by actually installing it.
Installation
As of this writing, the current stable version is 1.0.2, while 1.1 is in release candidate, and 1.2 is the development version. Things are moving quickly though. While the splash-screen discourages from using it for production work, I have spent quite a few hours on version 1.2 now and found it to be pretty stable and reliable — and since my goal is to show you what “modern” FreeCAD looks like, we will be using the weekly development version to get started throughout this series. All these shiny new features will soon be released as stable anyway.
For installation instructions and download links, head over to the official website : https://www.freecad.org/downloads.php. When v1.2 is released as stable everything will be available directly there, but for now, scroll a bit to the Development versions section and click on Weekly builds. Find the latest Development Build weekly release, where you will find the download links in the Assets :
- on Windows take the latest installer :
FreeCAD_weekly-<version>-Windows-x86_64-py311-installer.exe; - on Linux, take the AppImage :
FreeCAD_weekly-<version>-Linux-x86_64-py311.AppImage; - on MacOS, depending on your CPU (Intel or ARM), take either the x86_64 or the arm64 DMG :
FreeCAD_weekly-<version>-macOS-x86_64-py311.dmgorFreeCAD_weekly-<version>-macOS-arm64-py311.dmg.
Of course, on Linux, you also have the option to look at your system’s repositories. In my case, I’ve been using the freecad-weekly-appimage package from the AUR.
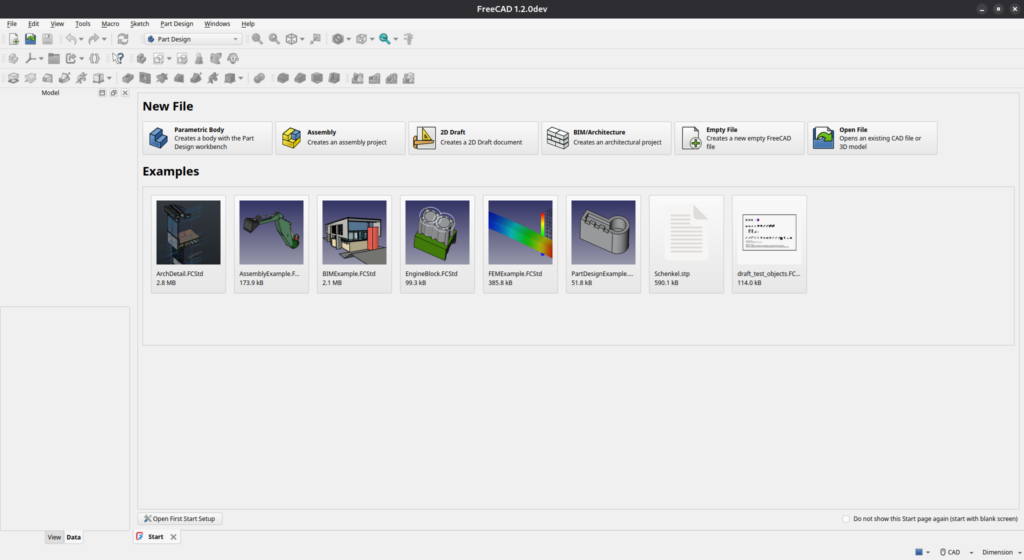
First launch
When you launch FreeCAD for the first time, you are greeted with a Welcome screen that offers you some global customization :
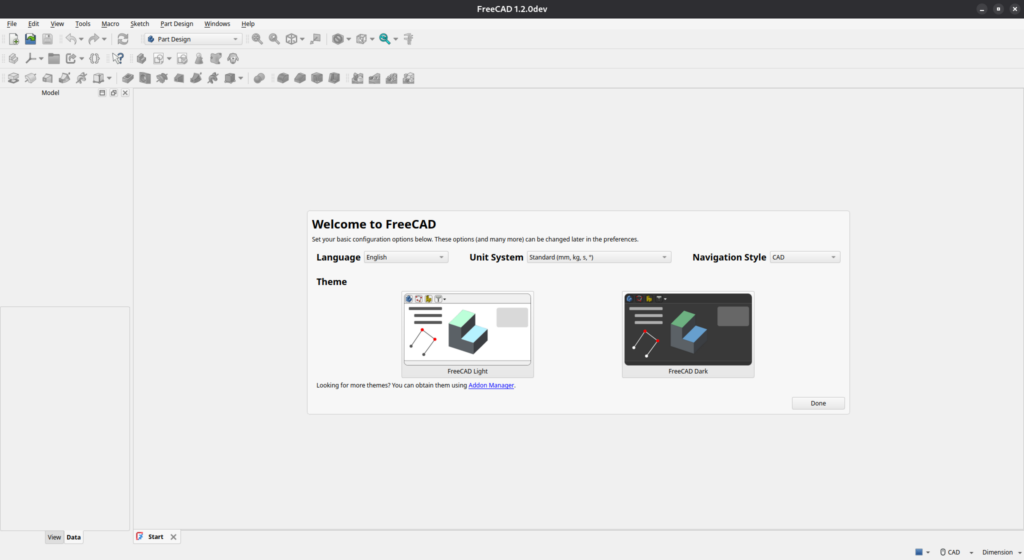
I recommend that you leave the language to English for now, in order to make sure we’ll use the same vocabulary for this introduction – you can change it to another language once you are a bit more familiar with the software. Select your preferred unit system and navigation style. Don’t worry about the theme now, we will customize it shortly. Simply click Done and you will be redirected to the Start page.
Configuration
We will start by installing an addon called OpenTheme which will customize the look of the UI to make it feel more in-par with other modern CAD packages (or even better, because the latter usually don’t offer a dark mode). Of course, this is first and foremost a matter a taste : this is what I’m using, but feel free to tweak the instructions below to find what you like best.
First, open the Addon Manager :

Then look for OpenTheme :
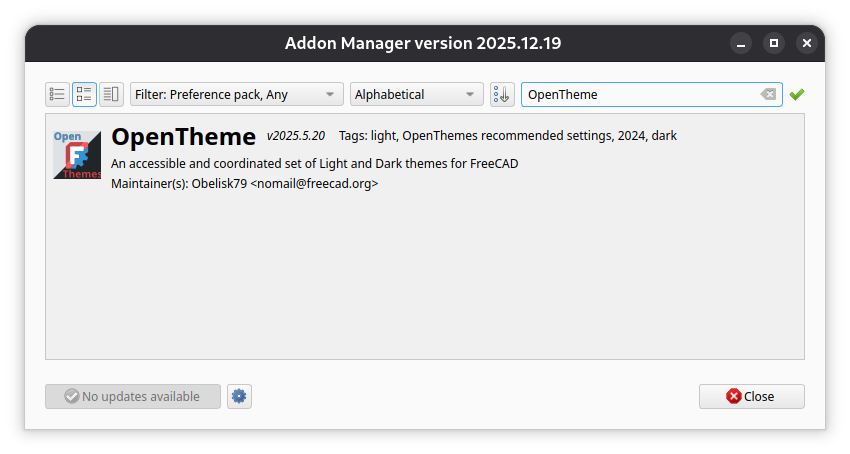
Double-click on it and install it, then close the Addon Manager.
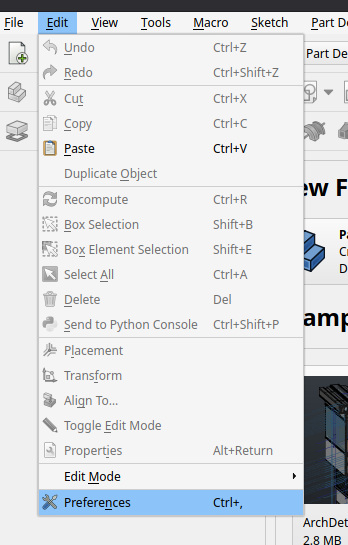
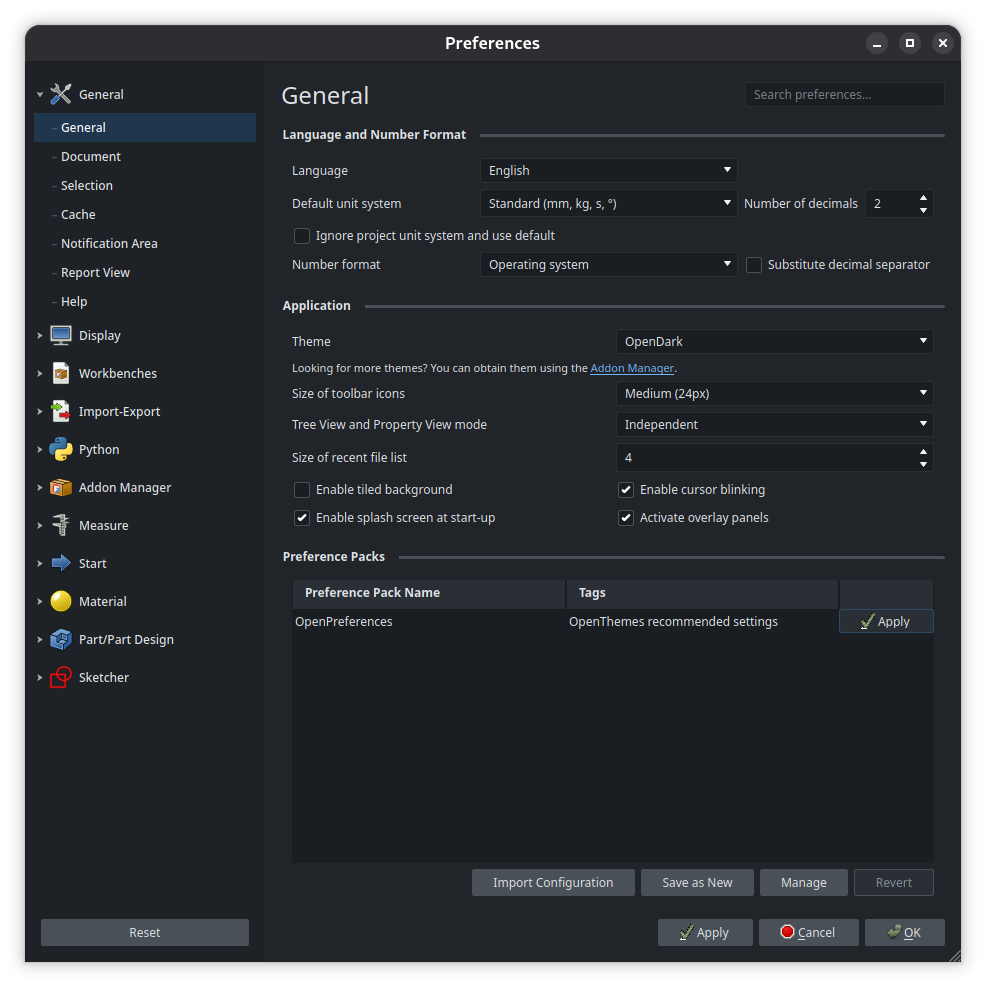
Now, head over to the Preferences panel :
In the first page (General), under Preference Packs, you will find OpenPreferences, which was added by the OpenTheme addon. Click on Apply next to it. Then, in the Theme selector a few lines above, select either OpenLight or OpenDark, and click Apply on the bottom of the panel. I will be using the dark theme, which is easier on the eyes. The UI should update accordingly :
From there, we will also tweak a few other settings in order to make our lives easier. Depending on your exact version of FreeCAD and OpenTheme, some of these settings might already be correct, but I’ll specify them anyway in case you don’t want to use OpenTheme.
In General / General :
- Size of toolbar icons : Large (32px)
- Tree View and Property View mode : Independent
In General / Document :
- Save auto-recovery information every : 5 min
Or even lower if you like. While it is pretty reliable, we are running the development version after all, better be safe.
In General / Selection :
- Check Preselect the object in the 3D view when hovering the cursor over the tree item
- Check Auto expand tree item when the corresponding object is selected in the 3D view
In Display / 3D View :
- Check Use OpenGL VBO (Vertex Buffer Object)
- Anti-aliasing : MSAA 8x
- Transparent objects : Backface pass
In Workbenches / Available Workbenches :
- Keep only the following workbenches, and sort them in that order by drag-and-dropping them : Sketcher, Part Design, Part, Draft, Surface, Spreadsheet, Assembly, TechDraw. Also, check Auto-load for all of them. This should look something like this :
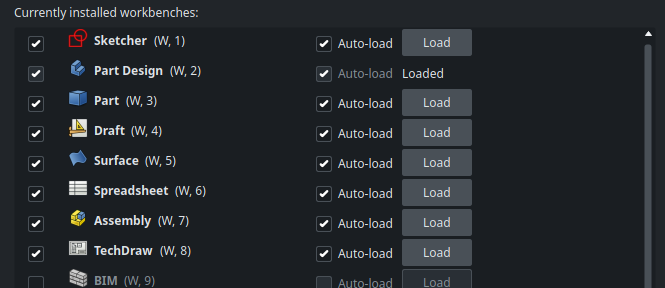
These are the main workbenches that are useful for most situations, and not checking too many of them will make the menu more readable. If you see workbenches that sound interesting to you, like the CAM workbench, feel free to keep them as well. In any case, not checking a workbench here only means that it is not displayed in the main toolbar, but you can still open any installed workbench easily using the dropdown menu.
- Also, make sure that Workbench selector type is set to TabBar
In Part/Part Design / Shape Appearance :
- Vertex size : 1px
This will make the 3D models prettier without those little dots characteristic of FreeCAD.
In Sketcher / General :
- Check Auto remove redundant constraints
Uncheck Notify about automatic constraint substitutions
FreeCAD’s sketches solver can be a bit strict and verbose at times by default, this will tell him that everything’s fine. - Uncheck Esc key can leave sketch edit mode
Since the Esc can be used to deselect the current tool, this will prevent you from closing your sketch accidentally. - Check Always add external geometry as construction
We’ll learn about what “external geometry” means in a future post.
In Sketcher / Display :
- Check Show dimensional constraint name with format : %N = %V
When we give an explicit name to a dimension in a sketch, we want to see that name directly next to the value of the dimension. - Check Open sketch in section view mode
Automatically viewing a sketch in section mode (with the geometry in front of the sketch hidden) will make the view clearer.
I admit that’s quite a few things to change, but we only need to do it once and it will help us make ourselves at home. Validate by clicking Ok on the bottom right of the panel, then restart FreeCAD to apply the changes.
If you want to further customize the UI, here are two other addons that you may want to take a look at :
– PieMenu Workbench
– FreeCAD-Ribbon
That’s it for now ! Next time, we’ll look into the fundamental concepts of FreeCAD. See you then !